

R-KEM II Styrene free polyester resin.
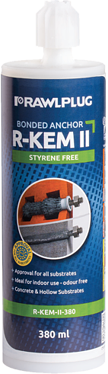
High quality bonded anchor. Styrene free polyester resin, suitable for use in non-cracked concrete and wide range of solid or hollow masonry structures. Approved for 15 substrates
| Scan the QR code for installation |  |
[175 ml]
Features:
- Easy to use - patented self-opening foil system
- Ideal for indoor use - styrene free, odourless
- Wide range of applications in the medium load range
- Ideal for applications where conventional expansion anchors are not appropriate
- Easy pumping thanks to patented self opening system and manual or pneumatic dispensers
- Can be used with standard silicone dispenser
- Suitable for repetitive use. Partly used product can be reused fitting a new mixing nozzle
Applications
- Staircases
- Gates
- High racks
- Canopies
- Sanitary appliances
- Steel constructions
- Window elements
- Railings
- Handrails
- Consoles
- Ladders
- Cable trays
Base materials
Approved use in:
- Non-cracked concrete C20/25-C50/60
- Solid Concrete Block
- Hollow-core Slab
- Solid Brick
- Solid Sand-lime Brick
- Hollow Sand-lime Brick
- Hollow Brick
- Vertically-perforated clay block
- Hollow Lightweight Concrete Block
- Also suitable for use in:
• Natural Stone
Installation guide
 |

|

|

|
 |

|

|
|

|
|
- Drill hole to the required diameter and depth for stud size being used.
- Solid substrates: clean the hole with brush and hand pump at least four times each. It is very important and necessary before installation. Hollow substrates: insert mesh sleeve into the hole.
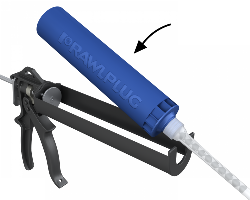
- Insert cartridge into gun and attach nozzle.
- Dispense to waste until even colour is obtained.
- Insert the mixing nozzle to the far end of the hole and inject resin, slowly withdrawing the nozzle as the hole is filled to 2/3 of its depth.
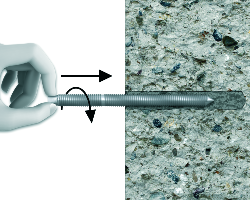
- Immediately insert the stud, slowly and with slight twisting motion. Remove any excess resin around the hole before it sets and leave it undisturbed until the curing time elapses.
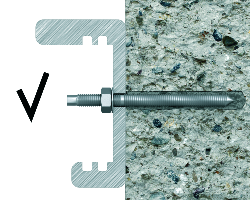
- Attach fixture and tighten the nut to the required torque.
Rawlplug's R-KEM II Styrene Free Polyster Resin Installation
Rawlplug's R-KEM II Styrene Free Polyster Resin Installation
You might also like


TORK CRAFT
Regular price
R 117.99
— Sold Out

